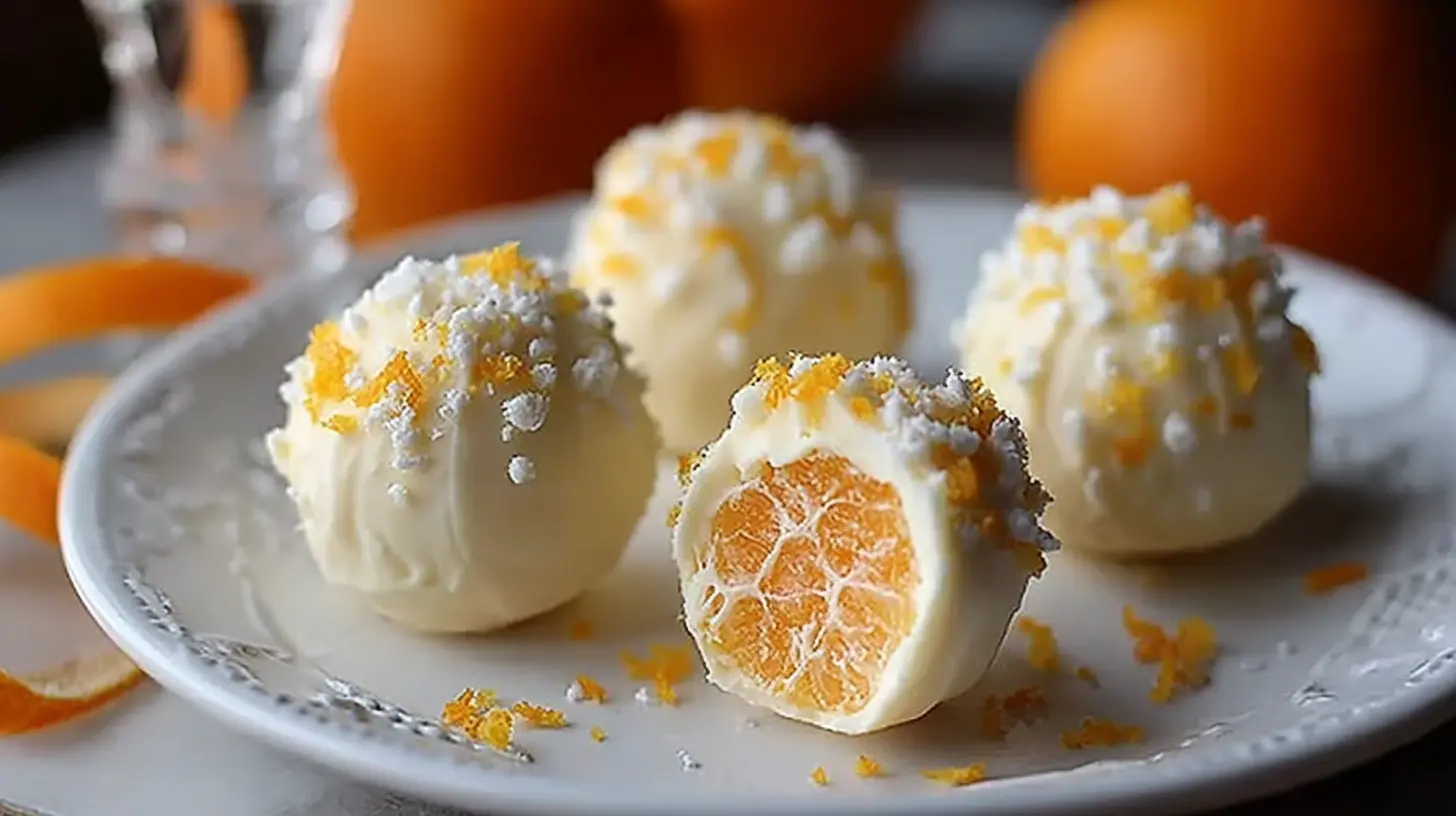
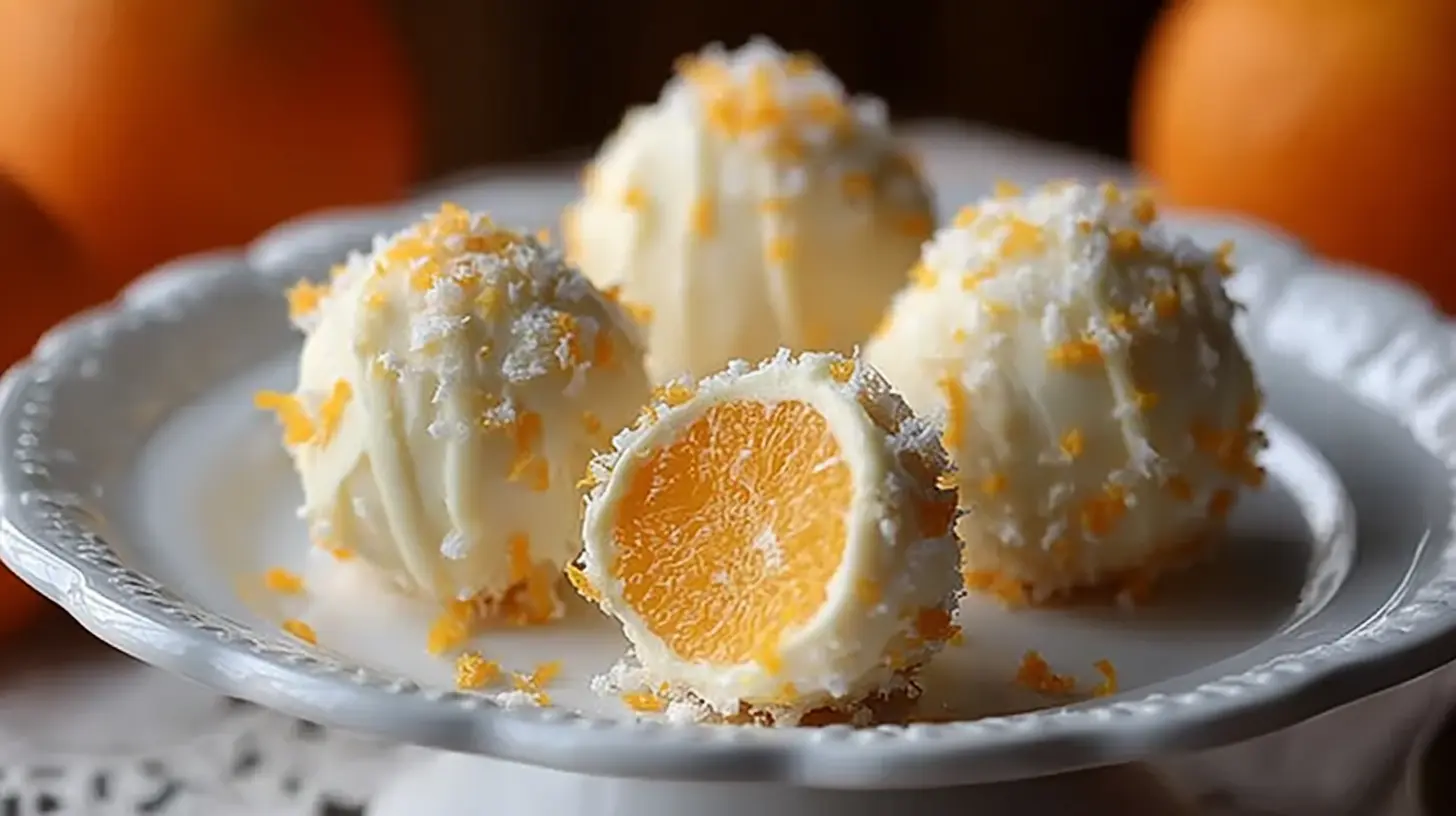
Sometimes, after a long day, the last thing I want to do is turn on the oven, but my sweet tooth rarely gets the memo. That’s exactly how these Creamy No-Bake Orange Truffles became a staple in my kitchen. They’re an absolute lifesaver when you need a luxurious, zesty treat without any fuss. Imagine biting into a velvety, citrus-infused delight that practically melts in your mouth – and you made it in minutes, no baking required! These aren’t just easy; they’re surprisingly versatile, offering a little burst of sunshine in every bite.
Reasons to try it
You know those moments when a dessert craving hits, but the thought of complex recipes and oven timers sends shivers down your spine? That’s where these “Creamy No-Bake Orange Truffles” truly shine. You’ll absolutely adore this dish because it’s the epitome of effortless elegance. It’s perfect for a spontaneous treat, a last-minute gift, or just when you want something sweet and satisfying without breaking a sweat. Plus, that vibrant orange zest isn’t just for flavor; it adds a refreshing lift that many no-bake treats lack, making these feel surprisingly light and bright.
> “I honestly didn’t believe a no-bake treat could taste this gourmet! The orange flavor is so fresh, and they’re incredibly easy to whip up. My kids loved rolling them in sprinkles!” – A delighted home cook.
The cooking process explained
Making these Creamy No-Bake Orange Truffles is wonderfully straightforward, so you won’t need to block out hours in your schedule. You’ll start by combining creamy ingredients with the bright zest of oranges. This mixture then gets chilled, making it firm enough to roll into bite-sized balls. Finally, a quick dip or roll in your chosen coating transforms these simple spheres into dazzling truffles. It’s a fun, hands-on process that even little helpers can enjoy!
Gather these items
When preparing these delightful truffles, you’ll need just a handful of straightforward ingredients, most of which you might already have on hand.
- Cream cheese: Full-fat cream cheese works best for that rich, creamy texture. Make sure it’s softened at room temperature.
- Powdered sugar: Also known as confectioners’ sugar, this helps sweeten the truffles and creates a smooth consistency.
- Fresh oranges: You’ll need the zest for intense citrus flavor and a tiny bit of juice to bring it all together. Organic is great if available, for the zest.
- Vanilla extract: A touch of vanilla complements the orange beautifully.
- Optional coatings: Shredded coconut, chopped nuts (pistachios or almonds are lovely), melted white or dark chocolate, cocoa powder, or colorful sprinkles.
Directions to follow
Let’s get these delectable truffles made! Follow these simple steps for perfect results every time.
- Prepare your base: In a medium mixing bowl, beat the softened cream cheese with a hand mixer or stand mixer until it’s light and fluffy, about 1-2 minutes.
- Add the sweetness and flavor: Gradually add the powdered sugar, mixing until fully incorporated and smooth. Scrape down the sides of the bowl as needed.
- Introduce the orange: Stir in the orange zest and vanilla extract. Add 1-2 teaspoons of fresh orange juice – start with one and add more if needed to achieve a creamy, but still firm, consistency. Be careful not to add too much liquid.
- Chill the mixture: Cover the bowl with plastic wrap and refrigerate for at least 1 hour, or until the mixture is firm enough to roll. This step is crucial for truffles that hold their shape.
- Form the truffles: Once chilled, use a small cookie scoop or two spoons to portion out small amounts of the mixture. Roll each portion gently between your palms to form smooth, uniform balls, about 1-inch in diameter.
- Coat your truffles: Roll the truffles immediately in your desired coating (e.g., shredded coconut, chopped nuts, cocoa powder, or sprinkles). If using melted chocolate, dip each truffle and place it on parchment paper to set.
- Final chill: Place the finished truffles back on a plate or baking sheet lined with parchment paper and refrigerate for another 30 minutes to firm up completely before serving.
Best ways to enjoy it
These Creamy No-Bake Orange Truffles are a joy on their own, but a few creative touches can elevate the experience. For an elegant presentation, arrange them in mini paper candy cups on a pretty platter. They’re wonderful alongside a cup of freshly brewed coffee or a light herbal tea. During warmer months, try serving them chilled with a glass of sparkling water infused with mint. They also make a fantastic edible gift, carefully placed in a decorative box tied with a ribbon. Think of them as a bright pop of color and flavor at any dessert table!
The best way to save extras
Proper storage is key to keeping your Creamy No-Bake Orange Truffles fresh and delicious. Once coated and firmed, store them in an airtight container in the refrigerator. They will stay fresh for up to 5-7 days. If you’ve used a chocolate coating, stacking them too tightly might cause them to stick, so consider layering them with parchment paper in between.
For longer storage, these truffles actually freeze quite well, especially if they are coated in chocolate or coconut. Place them in a single layer on a parchment-lined baking sheet in the freezer for about an hour until solid. Then, transfer them to a freezer-safe airtight container or bag. They can be frozen for up to 1 month. Thaw them in the refrigerator for a few hours before serving.
Tricks for success
Even though these truffles are super easy, a few insider tips can take them from good to absolutely glorious:
- Zest with care: When zesting your oranges, make sure to only get the bright orange part and avoid the white pith underneath, which can be bitter. A microplane zester works wonders here.
- Soften cream cheese fully: This is critical for achieving a smooth, lump-free truffle mixture. If it’s too cold, you’ll end up with tiny bits of cream cheese in your mix.
- Don’t overmix: Once the powdered sugar is incorporated, avoid excessive mixing. Overmixing can incorporate too much air, making the mixture less dense and harder to roll.
- Chill, chill, chill: The chilling steps aren’t optional! A well-chilled mixture is much easier to handle and roll, preventing sticky, messy hands and ensuring your truffles hold their shape beautifully.
- Gloves are your friend: If you find the mixture sticky while rolling, dampen your hands slightly or wear food-safe gloves. This helps a lot!
Creative twists
The beauty of these truffles lies in their adaptability! Here are 7 fantastic ways to play with this recipe:
- Chocolate Dipped: Melt some good quality dark, milk, or white chocolate with a teaspoon of coconut oil. Dip the chilled truffles and let them set on parchment paper.
- Coconut Zing: Roll the truffles generously in fine desiccated coconut for a tropical twist and lovely texture.
- Nutty Crunch: Finely chop toasted almonds, pistachios, or walnuts and roll the truffles in them for an earthy, crunchy coating.
- Spice it Up: Add a tiny pinch of cinnamon or cardamom to the truffle mixture along with the orange zest for a warmer flavor profile.
- Liqueur Infusion: For an adult version, substitute 1/2 teaspoon of orange juice with orange liqueur (like Grand Marnier or Cointreau) for a sophisticated touch.
- Ginger Sparkle: Mix finely chopped candied ginger into the truffle mixture or roll the finished truffles in a blend of powdered sugar and finely grated fresh ginger for a spicy-sweet kick.
- Lemon-Orange Swirl: Replace half the orange zest with lemon zest for a brighter, more complex citrus profile.
Common questions
How long does it take to prepare these truffles?
The active preparation time for these truffles is quite quick, usually around 15-20 minutes. However, you’ll need to account for two chilling periods: one for the mixture (at least 1 hour) and one for the finished truffles (at least 30 minutes). So, plan for about 2 hours total from start to finish, including chilling.
Can I use orange extract instead of fresh orange zest and juice?
While you can technically use orange extract, fresh orange zest and juice provide a much brighter, more authentic, and vibrant citrus flavor that is difficult to replicate with extract. If you must use extract, start with 1/4 teaspoon and taste, adding more sparingly as needed, as extracts can be very potent.
Are these truffles gluten-free?
Yes, this recipe is naturally gluten-free, assuming all your ingredients (especially optional coatings like sprinkles) are also certified gluten-free. It’s always a good idea to double-check labels if serving to someone with celiac disease or a gluten sensitivity.
Zesty No-Bake Orange Cream Cheese Truffles
Ingredients
Equipment
Method
- In a medium bowl, beat softened cream cheese until light and fluffy (1-2 minutes).
- Gradually add powdered sugar, mixing until smooth, scraping the bowl as needed.
- Stir in orange zest, vanilla extract, and 1-2 teaspoons of fresh orange juice (or orange liqueur for an adult version), being careful not to add too much liquid.
- Cover and refrigerate the mixture for at least 1 hour until firm enough to roll.
- Once chilled, scoop 1-inch portions and gently roll them into smooth balls between your palms.
- Roll truffles immediately in desired coatings like shredded coconut, nuts, cocoa powder, or sprinkles; if using melted chocolate, dip each truffle and place on parchment paper to set.
- Refrigerate finished truffles on parchment paper for another 30 minutes to firm up completely before serving.
- Store truffles in an airtight container in the refrigerator for up to 5-7 days; for longer storage, freeze for up to 1 month and thaw in the refrigerator before serving.