The school year often feels like a whirlwind, doesn’t it? I remember those frantic mornings trying to pack lunches, especially when my kids were younger and their tastes changed faster than the weather. It felt like a constant battle against the clock and a never-ending quest for variety. That’s why I’ve always been fascinated by how other families manage the chaos. Instead of just sharing general tips, I reached out to six diverse families, each with their own unique strategies, to get a real-world look at how they tackle Back to School Meal Prep. What I found was a treasure trove of practical ideas, smart shortcuts, and a whole lot of relatable honesty.
Why you’ll love embracing meal prep
There are countless reasons why dedicating some time to meal prep, especially when the school bells are ringing, can be an absolute game-changer. It’s not just about saving time (though that’s a huge plus!).
Firstly, it significantly reduces morning stress. Imagine waking up knowing lunches are already packed or dinner is halfway done. That calm start can genuinely set a better tone for everyone’s day. Secondly, it often leads to healthier eating habits. When you’re planning ahead, you’re less likely to grab quick, less nutritious options. Thirdly, it can be a budget-saver. Eating out less and utilizing ingredients efficiently means more money stays in your pocket. Lastly, it fosters a sense of organization and control amidst the often-hectic school week.
> “Meal prepping for school has completely transformed our mornings. No more mad dash for lunchboxes, and I feel so much calmer knowing everyone has a healthy meal waiting for them. It’s truly a game-changer!” — Sarah, mom of two.
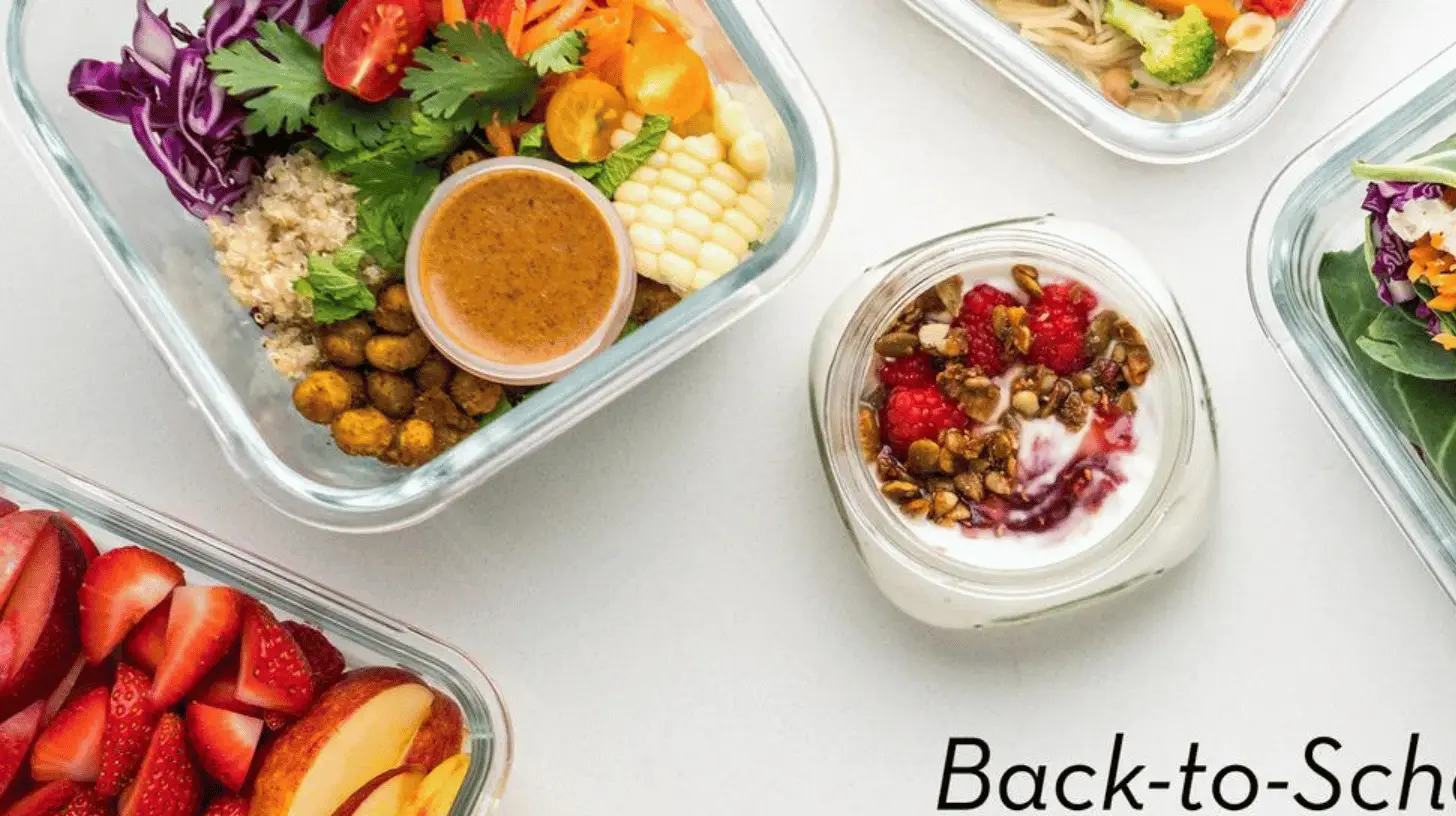
How 6 families do their Back to School Meal Prep
Before we dive into the specifics, let’s set the stage. The beauty of meal prep is that there’s no single “right” way to do it. It’s about finding what works for your family, your schedule, and your kids’ preferences. These families shared their approaches, from full Sunday cook-a-thons to daily micro-prepping.
What you’ll need
While every family’s approach is unique, there are a few common tools and ingredients that make any meal prep journey smoother:
- A well-stocked pantry: Staples like pasta, rice, canned beans, whole grains, and basic spices.
- Fresh produce: A variety of fruits and vegetables that can be prepped in advance (carrots, bell peppers, berries, leafy greens).
- Protein sources: Chicken, ground meat, eggs, tofu, deli meats, cheese, yogurt.
- Good quality storage containers: Reusable, airtight containers are essential. Look for different sizes and bento-style options.
- Cutting boards and sharp knives: For efficient chopping and dicing.
- Meal plans or idea lists: Even a simple list helps organize your thoughts.
Directions to follow: Unpacking their strategies
Here’s a glimpse into how six real families manage their Back to School Meal Prep:
Family 1: The Sunday Power Preppers (The Johnsons, 2 school-aged children)
- Strategy: Dedicate 2-3 hours on Sunday.
- What they prep:
- Lunch: Batch cook grilled chicken or turkey meatballs. Wash and chop all snack veggies (carrots, cucumbers, bell peppers). Portion out fruits (grapes, melon). Bake a batch of muffins or granola bars.
- Dinner: Cook a large pot of chili, soup, or a casserole that can last for 2-3 nights. Marinate chicken for quick weeknight grilling.
- Key takeaway: Focus on versatile proteins and make ahead dishes that pull double duty.
Family 2: The Daily Lunch Assemblers (The Chengs, 1 high schooler, 1 middle schooler)
- Strategy: Prep components on Sunday, assemble daily.
- What they prep:
- Lunch: Cook enough pasta or quinoa for the week. Hard-boil a dozen eggs. Slice deli meats and cheeses. Make a big fruit salad.
- Dinner: Chop all vegetables for upcoming stir-fries or sheet pan dinners. Pre-measure rice/pasta for quick cooking.
- Key takeaway: Ideal for families who like variety and don’t want to eat the same meal multiple times in a week.
Family 3: The “Dinner for Lunch” Crew (The Garcias, 3 elementary school children)
- Strategy: Simply make extra dinner each night.
- What they prep:
- Lunch: Purposefully cook larger portions of dinner items like pasta with sauce, roasted chicken and vegetables, or lentil soup, ensuring enough for lunchboxes the next day.
- Key takeaway: Minimal extra effort, maximal efficiency. Requires ensuring dinner choices are kid-friendly for lunch.
Family 4: The Ingredient Preppers (The Smiths, 2 preschool children)
- Strategy: Wash, chop, and portion individual ingredients rather than full meals.
- What they prep:
- Lunch: Cut up cheese cubes, portion out crackers, wash berries, chop cucumber sticks, pre-pack hummus containers.
- Dinner: Bag up chopped onions, peppers, and garlic ready for quick sautéing. Measure out spices for specific meals.
- Key takeaway: Great for busy parents who want to save time during actual cooking but prefer fresh assembly.
Family 5: The Freezer Fanatics (The O’Connors, 2 teenagers)
- Strategy: Large batch cooking once a month for freezer-friendly meals.
- What they prep:
- Lunch: Make large batches of breakfast burritos, homemade pizza rolls, or pre-portioned smoothie packs that can be grabbed and thawed/blended quickly.
- Dinner: Cook double batches of lasagna, enchiladas, meatballs, or hearty stews and freeze in individual or family-sized portions.
- Key takeaway: Strategic long-term planning, perfect for families who want to cook less often.
Family 6: The Snack Station Setup (The Davises, 1 toddler, 1 elementary-aged child)
- Strategy: Focus on easily accessible, healthy snacks and components.
- What they prep:
- Lunch/Snacks: Create a “grab-and-go” snack bin in the fridge with yogurt tubes, cheese sticks, pre-cut fruit, veggie sticks with dip. Designate a pantry shelf for healthy non-perishable snacks like whole-grain crackers and fruit leathers.
- Key takeaway: Empowers kids to choose healthy options themselves and simplifies snack packing.
What to serve with the prepped meals
The beauty of meal prep is that the “serving” is often already integrated! However, a few tips can elevate the experience:
- For lunches: Always include a fruit and a vegetable, even if it’s just sliced apples and baby carrots. A small treat can also be a nice touch. For meals like pre-made pasta, a small side salad (packed separately with dressing) can add freshness.
- For dinners: When reheating a prepped main course, consider a quick fresh side. For example, serve that frozen lasagna with a simple green salad, or pair marinated chicken with steamed broccoli that cooks in minutes.
Storage and reheating tips
Proper storage is crucial for food safety and taste.
- Containers: Invest in good quality, airtight containers. Glass containers are excellent for reheating directly in the microwave or oven. Divided containers are perfect for keeping lunch components separate.
- Cooling: Always cool food completely before packing it into containers and storing it in the fridge. This prevents condensation and keeps food fresher longer.
- Refrigeration: Most prepped meals are good for 3-4 days in the refrigerator. Label containers with the date.
- Freezing: Many cooked dishes (soups, stews, casseroles, meatballs) freeze beautifully for up to 2-3 months. Ensure they are completely thawed in the refrigerator before reheating.
- Reheating: Most prepped meals can be reheated in the microwave. For best results, stir halfway through. Oven reheating is great for casseroles or anything you want to crisp up slightly.
Helpful cooking tips for success
- Start small: Don’t try to overhaul your entire eating strategy overnight. Pick one meal (e.g., lunches) or one day (Sunday prep) to focus on first.
- Involve the kids: They’re more likely to eat what they helped choose or prepare. Let them wash veggies, assemble their own snack bags, or pick lunchbox themes.
- Batch cook staples: Proteins (chicken, ground beef, hard-boiled eggs), grains (rice, quinoa), and roasted vegetables can be cooked once and used in multiple meals.
- Leverage kitchen gadgets: Your Instant Pot can cook grains and proteins quickly. A good food processor will speed up chopping.
- Theme nights: Having a “Taco Tuesday” or “Pasta Monday” can simplify decision-making. Prepping components for these themes helps.
- Don’t chase perfection: Some weeks will be better than others. The goal is progress, not perfection.
Creative twists and variations
The beauty of meal prep lies in its adaptability. Don’t be afraid to experiment!
- Flavor Boosters: Keep a variety of dressings, sauces, and spices on hand to change up the flavor profile of basic prepped ingredients. A simple grilled chicken breast can be Italian one day, Mexican the next, with just a change of sauce.
- Breakfast Prep: Don’t forget breakfast! Overnight oats, breakfast burritos, or pre-made smoothie packs are fantastic ways to streamline mornings.
- Dessert/Treat Prep: Bake a batch of healthier cookies or energy balls at the beginning of the week for a controlled sweet treat.
- Dietary Swaps: Easily adapt recipes for dietary needs. Use gluten-free pasta, substitute plant-based proteins, or swap dairy with alternatives.
- “Deconstructed” Meals: Instead of a full meal, prep components that can be assembled quickly. Think taco salad bars, Buddha bowls, or DIY pizza kits.
Your questions answered
Q1: What are the best foods to meal prep for school lunches?
A1: Some of the most popular and versatile foods for school lunch meal prep include hard-boiled eggs, grilled chicken strips, turkey meatballs, pasta salads, mini quiches, pre-cut fruits and vegetables, hummus with pita bread, yogurt parfaits, and homemade muffins or energy bites. The key is foods that hold up well in a lunchbox and taste good at room temperature or reheated.
Q2: How long do meal-prepped lunches typically last in the fridge?
A2: Most meal-prepped lunches, when stored properly in airtight containers, will last safely in the refrigerator for 3-4 days. Cooked proteins and dishes with vegetables usually fall within this timeframe. Salads with dressing added should ideally be eaten the same day, or dressing should be packed separately.
Q3: My kids are picky eaters. How can I make meal prep sustainable for them?
A3: Involve them in the process! Let them pick from a list of approved ingredients, help wash fruits and veggies, or even pack their own lunchboxes (with supervision). Offer choices within a healthy framework. Start with foods they already like and slowly introduce small amounts of new items alongside familiar favorites. “Deconstructed” meals where kids can assemble their own components (e.g., a “snack platter” style lunch) often work well for picky eaters.
DIY Lunchbox Sushi Bowls
Ingredients
Equipment
Method
- Place the cooked sushi rice into the bottom of a bento-style lunch container or a container with dividers.
- Arrange the chicken/tuna, carrots, cucumber, and edamame in separate sections or alongside the rice.
- Sprinkle the nori strips or crumbs over the chicken/tuna or rice.
- Optionally, sprinkle sesame seeds over the ingredients for garnish.
- Pack a small, separate container with soy sauce or tamari for dipping.
- Include a fork or chopsticks for eating.
- Store the assembled sushi bowl in the refrigerator for up to 3 days.